

User Uploaded Data tutorial
This tutorial will teach you to upload your own data and show it as a tree.
Step 1: Learn about the file formats
Tree Viewer can work with the following file formats:
Step 2: Download the test file
- Right-click on the following link to the test file (NewickTree.nwk): ftp://ftp.ncbi.nlm.nih.gov/toolbox/gbench/samples/NewickTree.nwk
- Choose the Save link as... command
- Save the test file to any convenient location on your hard drive
Step 3: Go to the Tree Viewer home page
Tree Viewer home page is located at http://0-www-ncbi-nlm-nih-gov.brum.beds.ac.uk/projects/treeview/
Step 4: Open the "Upload Data" dialog.
Open the "Upload Data" dialog by clicking on the Upload button.
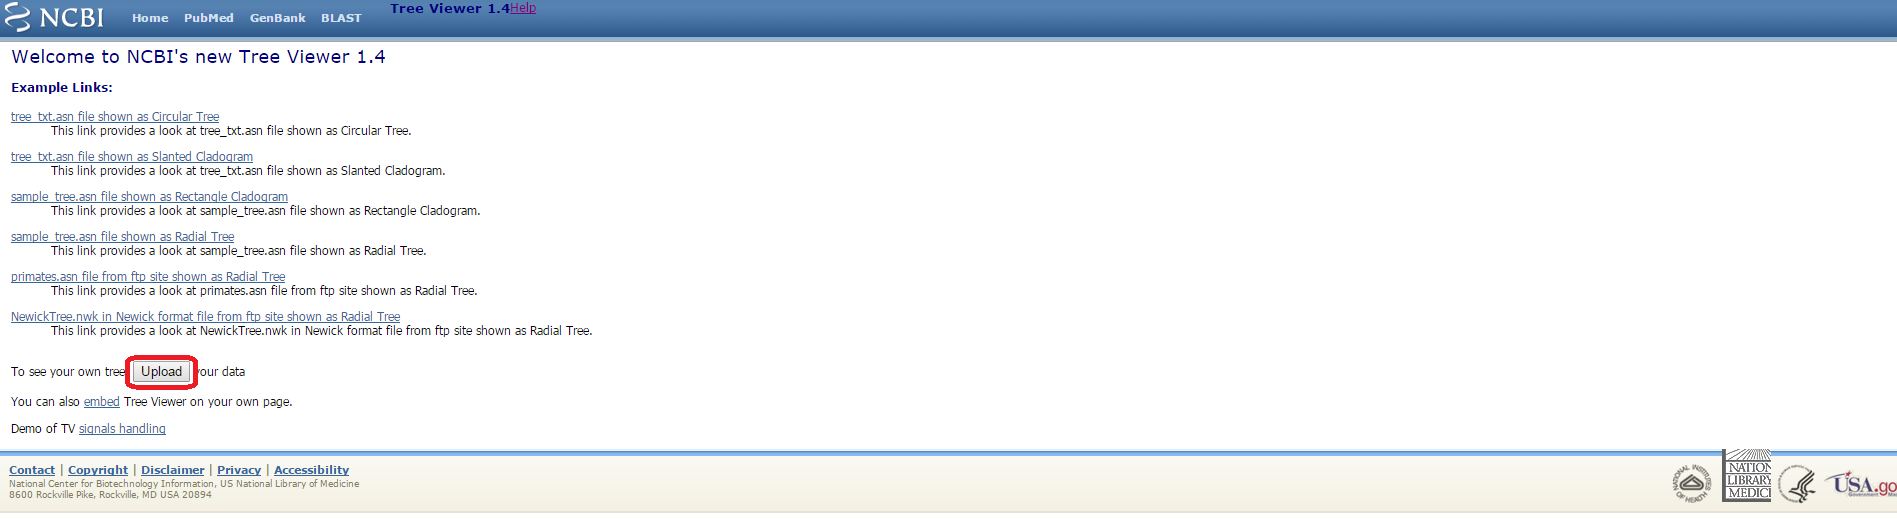
"Upload Data" dialog will be presented.
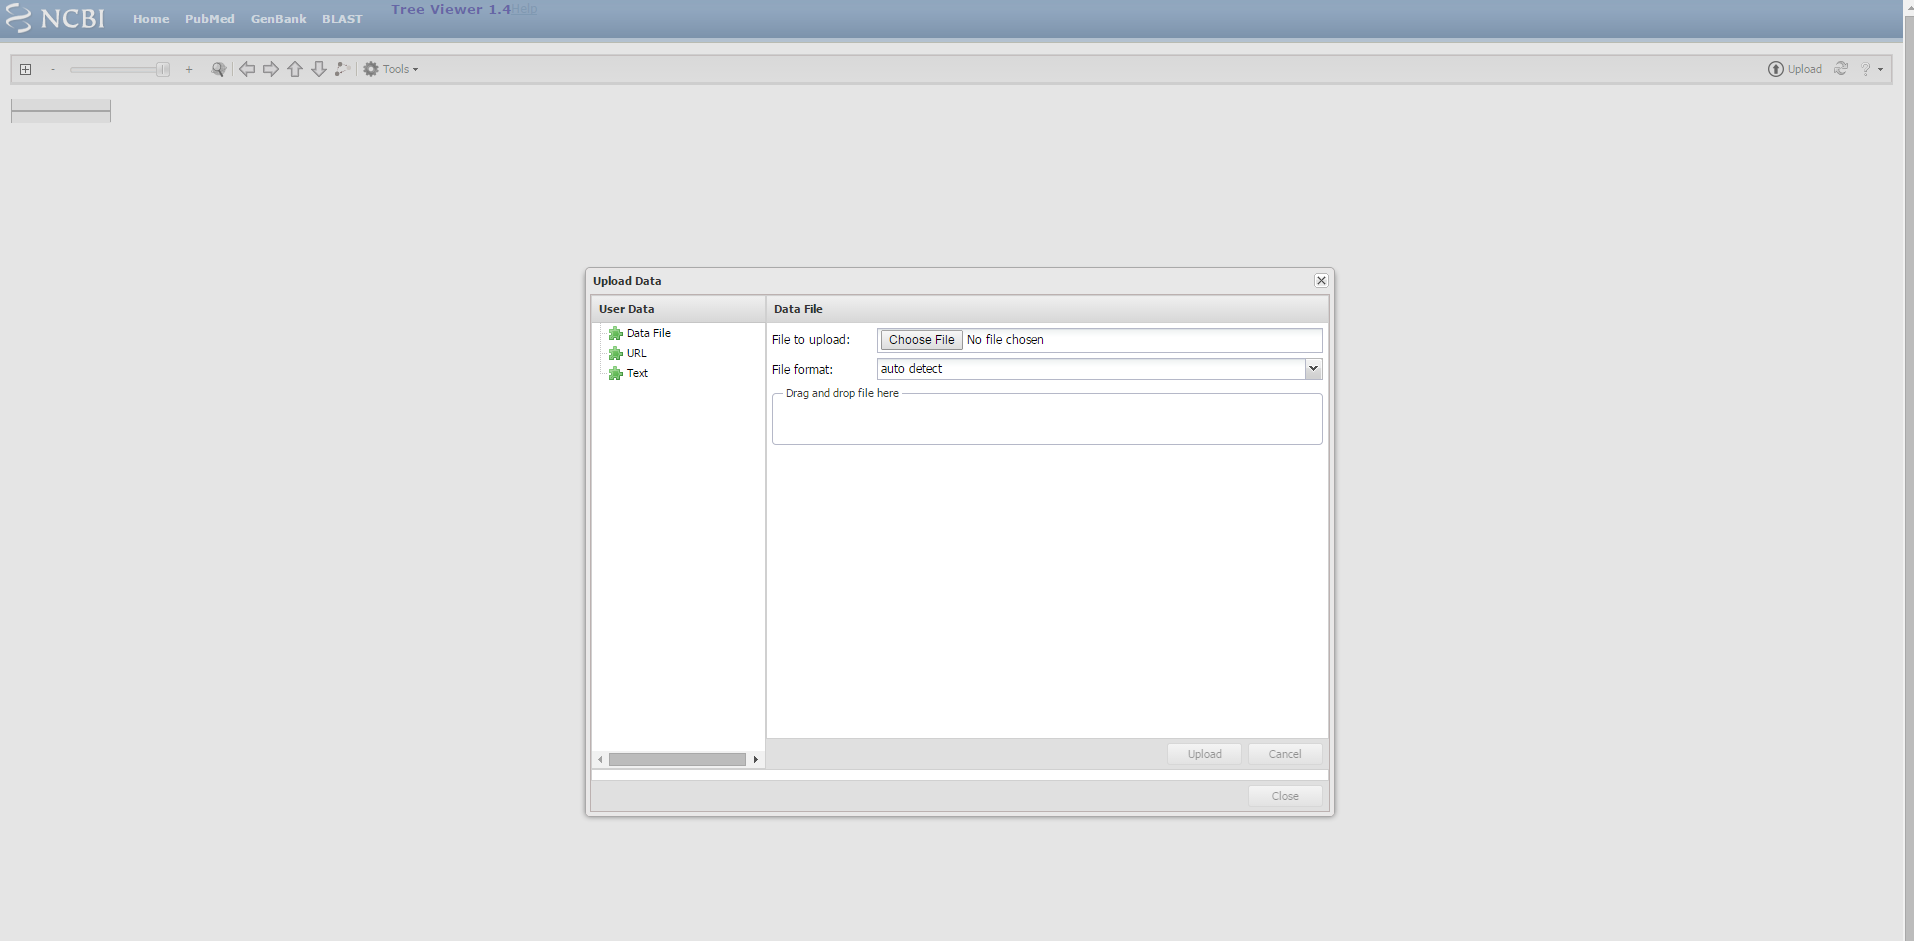
The left panel of the "Upload Data" dialog has three tabs:
- Data File
- URL
- Text
"Data File" tab is selected by default.
Step 5: Use the "Data File" tab
Click on the Choose File button in the right panel of the dialog and choose the test file in the location that you have downloaded it to in step 2.

You can also just drag and drop the file to the drag and drop area.

By default the file format setting is set to "autodetect". If the system fails to recognize the format of your file you can set it by choosing the format in the dropdown list.

Click on the Upload button.

If the upload process takes too long you can stop it by using the Cancel button.
Make sure that the desired tree is displayed in the background. If not - you can upload another file. Click on the Close button in the upload data dialog.

The test file tree will be displayed.

Step 6: Use the "URL" tab
Reopen the "Upload Data" dialog by going to the Tree Viewer home page and clicking on the Upload button. You can also open the same dialog by clicking on the Upload button on any tree page.

Click on the "URL" tab of the "Data Upload" dialog.

Copy the test file URL into the "URL" box.

Click on the Upload button and than on Close button in the upload data dialog. The test file tree will be displayed.
Step 7: Use the "Text" tab
Reopen the "Upload Data" dialog and click on the "Text" tab.;

Open the test file URL in a separate browser window. The content of the test file will be displayed.

Copy the content of the test file and paste it into the text area of the "Upload Data" dialog "Text" tab.
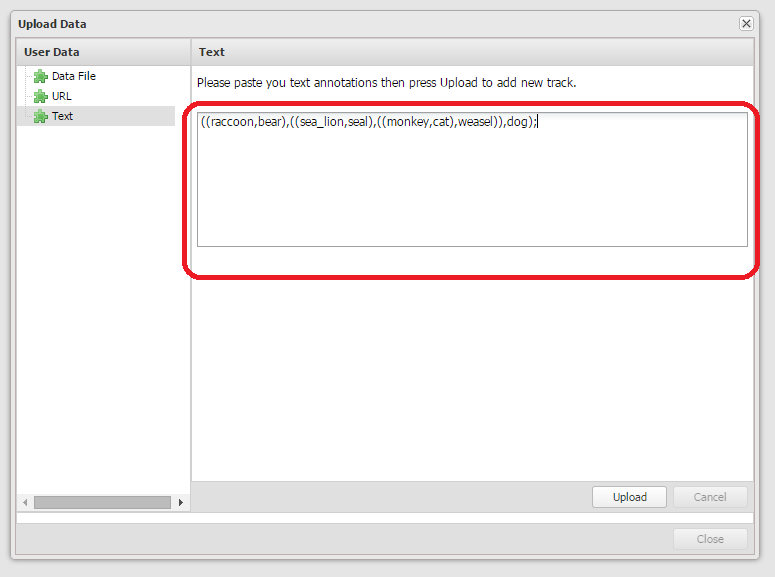
Click on the Upload button and than on Close button in the upload data dialog. The test file tree will be displayed.
Step 8: Upload data using service URL with parameters
If you know the location of your tree file you can use URL parameters to activate the Tree Viewer service and upload your data. The URL is formed as following:
- Main URL pointing to the service: http://0-www-ncbi-nlm-nih-gov.brum.beds.ac.uk/projects/treeview/tv.html
- HTTP query string separator: ?
- appname parameter (we strongly encourage you to always use it): appname=ncbi_tviewer
- HTTP query parameter separator: &
- url parameter with the tree file ftp location: url=ftp://ftp.ncbi.nlm.nih.gov/toolbox/gbench/samples/NewickTree.nwk
Resulting URL will be: http://0-www-ncbi-nlm-nih-gov.brum.beds.ac.uk/projects/treeview/tv.html?appname=ncbi_tviewer&url=ftp://ftp.ncbi.nlm.nih.gov/toolbox/gbench/samples/NewickTree.nwk"
For more parameters to use please see the Parameters description page
Tree Viewer home page has an appropriate example.

Table of Contents
- Tree Viewer documentation home
- Tree Viewer application home
- For Users
- User Tutorials
- For Developers
- Related Resources